Things That Can be Carried on a Bike (#416 & #417), a Brief Story Behind it, and a Simple Recipe

#416 (first photo above)…a canvas bag containing a few books; a double plastic bag containing a cooked turkey carcass, and a few vegetables for mirepoix.

#417 (second photo above)…a cardboard box containing 18 pint contains full of still-warm turkey broth.

Okay, so here’s the deal. Nearly every year, after our Thanksgiving feast at one of my sister’s houses, I take the turkey carcass(es) and make turkey broth with it/them the next day. I usually have off of work and it’s a great day just to take it easy around the house and let the broth simmer. Then, after straining and packaging it, I freeze it and have homemade broth for weeks/months ahead. Well this year I had to work…but I still took the turkey carcass (I’m a professional cook, I can’t let something that good simply be discarded). Anyhow, I carried the carcass to work, made the broth there (one of the many privileges of working in a kitchen), packaged it, and carried it home. It now resides in my small freezer for future use.

The recipe for turkey broth (which is super easy to make and really delicious) is below. For additional recipes that highlight ways in which to utilize Thanksgiving leftovers, click here or here.

Turkey Broth

1 cooked turkey carcass, and any scraps, juices, and pan scrapings
1 onion, quartered
1 carrot, cut into thirds
4 ribs celery, cut into thirds
4 cloves garlic, crushed
2 bay leaves
10 whole black peppercorns
Combine the ingredients in a heavy-bottomed stockpot and cover with enough cold water to cover them by two inches. Bring to a boil, then lower the heat to a slow simmer. Cook for a few hours, skimming the surface as necessary. Strain and refrigerate until needed. 

Enough Already!

I already have enough disposable stuff…I don’t need to take part in the madness that retailers named “black Friday.” And it’s now creeping into Thursday as well…being called “grey Thursday.” What’s next, “beige Wednesday?” And do we now–instead of wishing each other a Happy Thanksgiving–say Happy Grey Thursday? I noticed a few years ago that retailers have slowly been replacing the phrase Christmas or Holiday Season with the “shopping season.” Enough already! Do any of us really need that discounted iPad or flat screen TV. OK, sorry for the rant, I’ll get off my little soapbox now.

Urban Simplicity.

Gravy Deconstructed…

The following text was originally published in Artvoice; to see it at its original location, click here.

Gravy(grā’vē) n., pl.–vies a. The juices that drip from cooking meat. b. A sauce made by thickening and seasoning these juices.
–The American Heritage Dictionary

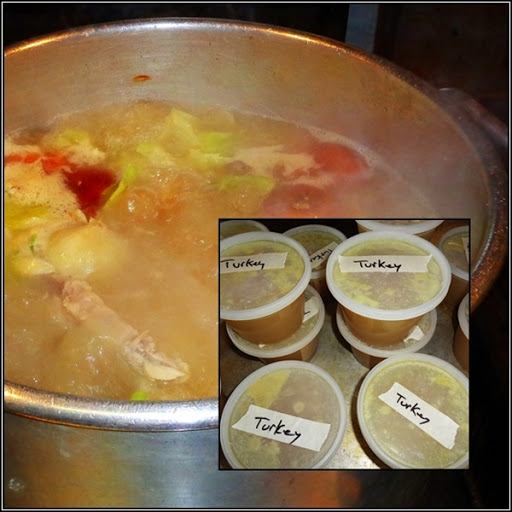
It’s as ubiquitous at a Thanksgiving feast as the turkey itself. Mashed potatoes would be nothing without it, ditto for the stuffing. Sometimes it’s thin and sometimes it’s thick but it’s always there. I’m of course speaking of gravy.

But what is it, really? If you think about it, it’s simply meat juice that has been thickened. But while this may be true it’s also nothing short of alchemy, for there are as many insipid and flavorless gravies as there are delectable ones.

Gravy may be part of our historical Puritan feast (though I do question if it were on the original Thanksgiving menu), but its roots go back further. Gravy is a simple sauce, to be sure, and French chefs were the first to codify sauce making. This said, gravy is something of a first cousin to the classic au jus (with juice), or jus lié(bound or thickened juice), or even more specifically and in plain English: the thickened juices that dripped from roasting meat.

The etymology of the word gravy also points to the French. According to historian Harold McGee, in his encyclopedic tome, On Food and Cooking, the word gravy comes from the antiquated French word, grané, which later became gravé. It’s easily apparent how this could come out sounding like gravy to an anglophile. Mr. McGee goes on to stay that the n was most likely changed to a v in a simple calligraphy error when transcribing one manuscript to another by hand.

Ok, by now you’re probably thinking enough with where it came from, just give me a recipe. The thing is, like many dishes, there is no one recipe for gravy, only methods; it really depends on your situation–but it’s still very simple to make. The variables are whether there’s a lot of liquid after the turkey is roasted or if the pan is dry, whether you’re making it directly in the roasting pan or a saucepot, and if you plan to thicken it with flour or cornstarch.

Speaking of starch, the preferred method by most professionals is flour, and to do this the flour should be cooked in fat (butter, oil, or turkey grease), lest it leave a lingering starchy flavor to the gravy. And when you cook flour and fat together you are really making a roux, which is not only the foundation to most thickened soups and sauces, but is also French in origin; the word roux is said to be derived from an old variation of the French word rouge, meaning red, which no doubt makes reference to the change of color that occurs when flour is cooked.

At any rate, I’ll stop complicating an uncomplicated recipe and offer three different methods for making gravy. They are extremely simple and can be adapted to whatever type of meat you happen to be roasting. When adding liquid to gravy I recommend using broth not water. Professional cooks have homemade stocks readily available, but in the home kitchen canned broth is perfectly acceptable. Keep in mind that canned broth already contains salt, even the low sodium variety.

Turkey Gravy #1: When the turkey is finished roasting and only a small amount of liquid remains this method works well. This is also the classic method.

Remove the turkey to a platter. Place the roasting pan on the stove over medium heat and cook it until the liquid evaporates. Pour off all but a couple tablespoons of fat. Add a few tablespoons of flour and cook it for a few minutes, taking care not to burn the flour. Then whisk in a cup or two of chicken broth and scrape any browned bits from the bottom of the pan, which are pure flavor. Simmer the gravy for a minute or two then strain it to remove any lumps and brown specks.

Turkey Gravy #2: If there is a large amount of liquid in the pan this is a better method to follow.

Remove the turkey to a platter. Pour the fat and liquid into a pot or bowl. Using a spoon or ladle transfer a few tablespoons of fat to a small sauce pot, remove the rest of the fat from the liquid and discard it. Heat the sauce pot over medium heat. Stir in an equal amount of flour and cook the flour/fat mixture for a minute or two while stirring. Add the turkey liquid to the sauce pot and bring to a simmer. Lower the heat and cook the gravy for a few minutes, then strain it to remove any lumps. Season with salt and pepper if necessary.

Gravy #3: This is the simplest method, though the gravy will have a transparent sheen to it, rather than the typical cloudy sauce-like appearance. With this method it doesn’t matter whether there is a lot of liquid or a little.

Remove the turkey to a platter. If there is a lot of liquid remaining in the pan, pour it into a sauce pot and remove and discard the fat. If there is little or no fat remaining in the pan add a couple cups of chicken broth and place it over medium heat. Scrape any browned bits from the pan, then transfer everything to a sauce pot; remove and discard the fat. Bring the liquid to a simmer. Dissolve a few tablespoons of cornstarch in an equal amount of cold water and add it to the simmering liquid. Bring the gravy to a boil and simmer for a minute or two. Season it, if necessary, and strain to remove any lumps or brown specks.

Two Views from my Handlebars

The weather this past week has been–as far as I’m concerned–perfect. Idyllically autumn. Crisp, barely a breeze, or cloud in the sky. Also perfect weather to be on a bike. The above photo is a building I pass everyday, and as I coasted past this evening the sun hit it just right. This is also a great example of beautiful Buffalo architecture. And below is a picture of another incredible sunset as I was just coasting into the parking lot of the health club. Click either for a larger view.

Urban Simplicity.

Things That Can be Carried on a Bike (#415)

Two canvas bags. One containing four books and a journal (among other things). And the other containing twelve newly sharpened chef’s knives of varies sizes.

Urban Simplicity.

Kartoffelsalat mit Speck (German Potato Salad with Bacon)


Ok, so a couple of things. Firstly, while I love and am fascinated by languages in general, I do not speak German…sometimes I can barely speak English. But thanks to Google Translate I can list this recipe in it’s mother tongue. I’ve mentioned in a previous post that while my heritage is half Lebanese, it is also half German. This recipe is based on my mother’s and one that I grew up with; we simply called it potato salad. I’ve always enjoyed it, and for some reason have some of my fondest memories of eating it (at room temperature…egad!) at Crystal Beach as a youth. Anyhow, it is very easy to make, and super delicious. It is best eaten warm but just as good at room temperature (and there’s something truly satisfying about eating leftovers straight from the fridge while the fat is congealed). This may not be the healthiest recipe, but it sure is tasty…and hey, everything in moderation, right? At least that’s what I try to tell myself.

German-Style Warm Potato Salad
Makes 10-12 servings

5 pounds potatoes, peeled and sliced
10 Slices bacon, diced
1/2 cup vegetable oil
1 small onion, diced
1/4 cup water
1/3 cup sugar
1/3 cup cider vinegar
1/2 teaspoon kosher salt
1/4 teaspoon black pepper

Place the peeled and sliced potatoes in a pot with enough water to cover them. Set the pot over high heat and boil the potatoes for about 10 minutes or until cooked but not falling apart. While the potatoes are cooking, combine the diced bacon and vegetable oil in a skillet over medium heat. Cook the bacon until the fat is rendered and it begins to brown, then add the onion and cook another few minutes until the onion is cooked but not browned. Stir in the water and sugar; stir and scrape the sides of the pan to remove any bacon flavor that may have adhered there. Remove the pan from the heat and stir in the vinegar, salt, and pepper. Drain the potatoes and transfer them to a bowl. Gently stir the bacon dressing into the potatoes while both are still warm. Allow the salad to rest for 5 minutes. Transfer the salad to a serving platter and serve warm or at room temperature.

Urban Simplicity.

Things That Can be Carried on a Bike (#414), and a view from my handlebars

Things on the bike…three cardboard boxes containing a gym bag full of wet clothes, dog food, sundries, $72.57 worth of groceries, three liters of red wine, and a double order of Chinese take out.
The view…another incredible view looking west over Lake Erie. Knowing sunsets like this last only a few minutes, I pulled the bike over to snap a picture. After turning the corner and locking up the bike at the grocery store–just a couple minutes later–it was gone.

Urban Simplicity.

From My Front Porch…

It’s interesting, I think, how these two photos were taken five minutes (or less) apart and from the same location but looking in different directions; the top photo is looking west while the bottom photo is looking south. But I’m getting ahead of myself.  I have the weekend off this week…the first in about a month. It feels great…two days in a row! But I had some reading and writing I needed to accomplish and that’s what I was doing when I looked out the window and saw the above scene. Knowing that skies like that usually only last a few minutes I took a break from my keyboard and grabbed my camera and went out on the front porch. I took the above photo then a couple minutes later then one below. A minute later the view pictured above had passed and it was officially dusk. I stood for a minute and welcomed the cold air on my skin. It was a nice break; I needed it. Anyhow, I thought I’d share.

Ezekiel Bread!

I made this today and am, in fact, eating a warm and butter-slathered slice as I type these words. This is still my favorite bread, and it is still the #1 reason people find their way to my meager blog. The recipe is below, but for more pictures and a brief description, click here. And better yet, to read my Biblical views on Ezekiel Bread (or at least my interpretation on this recipe), click here.

Whole Wheat Ezekiel Bread
Makes 2 or 3 loaves
12 cups water
2 tablespoons white beans
2 tablespoons red beans
2 tablespoons spelt berries
2 tablespoons lentils
2 tablespoons barley
2 tablespoons millet
2 tablespoons bulgur wheat
___________________
cooked beans and grains
½ cup cooking water
2 cups whole wheat flour
2 teaspoons instant yeast
___________________

4 cups whole wheat flour

3 tablespoons vital wheat gluten
2 cups cooking liquid
___________________
1/4 cup honey
1/4 cup olive oil
3 teaspoons kosher
3 teaspoons instant yeast

Boil the grains in the water in logical succession according to cooking times: first the white and red beans (about 60 minutes), when they are soft add the, spelt berries, lentils, and barley (about 30 minutes); lastly, add the millet and bulgar (about 10 minutes). The key is that after each addition the previous grain must be soft enough so that when all of the grains are in the pot they will all be equally soft; undercooked grains (especially the beans) can really ruin this bread. And as the grains cook add more water to the pot as necessary because the cooking liquid, which is full of nutrients, will become part of the recipe (keeping a lid on the pot will slow it’s evaporation). After the grains are cooked allow them to cool in the liquid to room temperature, refrigerating if necessary. After the grains are cooled drain them, squeezing them with your hands or the back of a spoon, reserving the cooking liquid.

Place two bowls side-by-side; one will hold the pre-ferment, the other autolyse. In one bowl combine the cooked and drained grains with ½ cup of the cooking liquid, 2 cups whole wheat flour, and 2 teaspoons instant yeast. Stir it just until combined then cover it with plastic wrap. In the other bowl combine 4 cups whole wheat flour, 3 tablespoons vital wheat gluten, and 2 cups cooking liquid; stir it just until combined then cover it with plastic wrap (take care not to get yeast into this bowl). Allow the bowls to rest at room temperature for about an hour, during which time the preferment will begin it’s job multiplying yeast and fermenting flour, and the autolyse will soak liquid, swelling the gluten.
After an hour or so, combine the ingredients from both bowls into the bowl of an upright mixer fitted with a dough hook. Add the honey, olive oil, salt, and 3 teaspoons of yeast (add the yeast and salt on opposite sides of the bowl. Knead the dough on medium speed for about 8 minutes. Place the dough in a lightly oiled container, cover it loosely, and allow to ferment for 1-2 hours, or until doubled in bulk. Deflate the dough and allow it to ferment an additional 30 minutes.

Turn the dough out onto a floured work surface and cut it into 2 or 3 pieces. Shape into loaves and place into lightly oiled pans. Loosely cover the loaves with plastic wrap and allow to ferment for 30-60 minutes, or until double in size and when gently touched with a fingertip an indentation remains.

Bake the breads for about 30-40 minutes, adding steam to the oven a few times (either with ice cubes or a spray bottle) and rotating the breads every ten minutes. The breads are done when they are dark brown and sound hollow when tapped upon. Remove the breads from their pans and allow them to cook on a wire rack for at least 10 minutes before slicing.


Things That Can be Carried on a Bike (#413)

 Photo taken in front of Allentown Music, which ironically is no longer located in Allentown.

A new soft-shell acoustic guitar case (for my son) and a birthday gift (to me) from my sisters.

Urban Simplicity.

Things That Can Be Carried on a Bike (#411 & #412)

#411…a large cardboard box containing 4 pans of food on it’s way to a local food pantry.

#412…a smaller cardboard box containing a small bag of dog food (on top of the box), and a few groceries and sundries.

Urban Simplicity.

Das Kuchen (rezept und fotos)…

Like many Americans, ancestrally speaking I am a mixed breed. My dad’s family is Lebanese—straight from the “Old Country”—hence the Lebanese-inspired recipes on this blog. My mom’s family is German (with maybe a bit of French, too…my grandfather’s family was Alsatian); they’ve been in this country since about 1830 the best that I can tell. And this—I believe—is where I inherited my love of baking; from my mom’s good baking.

When I think of Thanksgiving and Christmastime as a child my mind’s eye sees these memories through rose colored glasses…it looks sort of like a Norman Rockwell painting. We were poor, that’s for sure (not that I realized it then), but there was always plenty of food…especially homemade baked goods.

My mother—like many Buffalonians of German decent—grew up on Buffalo’s east side. She took pride in her baking skills, and even though she had a houseful of kids and worked full time she still managed to bake mountains of cookies and trays of kuchen for the holidays. Kuchen (pronounced kooken) is the German word for cake, and is more closely related to coffee cake than they are traditional cake or flaky pastry. I’m sure there are as many variations as there are those who make them. But this is about the one I grew up with.

I made kuchen at work the other day, and whenever I make it—and especially when I eat it—memories come flooding back. I made them in straight logs so they were easy to slice, but those that my mom made were always in a ring shape.

What’s distinctly unique about kuchen to many other coffee cakes is that it’s made with yeast-leavened dough rather than a chemically-leavened batter (quick bread). And though the dough is rolled flat, filled, and rolled into a log or crescent, it’s not a strudel because strudel utilizes a buttery unleavened flaky dough that more close resembles phyllo.

I can still picture the brown terracotta bowls resting on the radiator with a towel shrouding the pillow-like dough. I was told not to touch the bowl or leave the kitchen door open too long, lest it become drafty and the dough fall. It was such a mystery, seeming almost magical, how the dough would grow. It may be then that my fascination with yeast dough was first planted.

My mother learned to make the dough from her mother, who likely learned it from her mother, and so on. The handwritten recipe that was given one of my sisters and then to me was simply titled “foundation dough,” because it’s a basic one that can be used for a number of other things including the famous German doughnut, fastnachts (click here for the recipe), which are eaten on Shrove Tuesday just before Lent. Fillings for kuchen are left up to the baker and can encompass a wide variety of sweet ingredients (fresh or dried fruits, nuts, chocolate) just as long as the dough is first layered with melted butter, sugar, and cinnamon. The kuchen in the photos was made with dried dates, but my favorite is the one listed in the recipe below…cherry and walnut. Yum!

Cherry and Walnut Kuchen
Yield: 3 kuchen

For the dough:

1 cup water (room temperature)
1 cup milk (room temperature)
1/2 cup granulated sugar
4 tablespoons yeast
6-7 cups all-purpose flour, divided
3 large eggs
1/2 cup unsalted butter, melted
1 teaspoon salt

For the filling:

melted unsalted butter
granulated sugar
ground cinnamon
maraschino cherries, rinsed and chopped
chopped walnuts

Topping:

1 egg mixed with a little milk
poppy seeds
powdered sugar
milk

To make the dough, combine the water, milk, sugar, yeast, and two cups of flour in a large bowl. Allow to rest for 1 hour, or until the yeast is fully active. Transfer to an upright mixing bowl with a dough hook. Add the eggs, melted butter, salt, and 4 cups of flour. Run the mixer on low for 1 minute (if the dough seems too sticky add the remaining cup flour) then turn to medium and knead for 5 minutes. Transfer to a lightly oiled bowl, cover and let rest at room temperature for about an hour, or until double in size. Preheat an oven to 350F. Transfer the dough to a floured work surface and cut into three pieces. Shape into balls, cover and let rest 20 minutes. Roll into large ovals about 1/4 inch thick. Brush with melted butter and sprinkle liberally with sugar and cinnamon. Sprinkle with cherries and walnuts. Roll into logs then shape into crescents. Transfer to baking sheets lined with oiled parchment. Brush the with the egg/milk mixture and sprinkle with poppy seeds. Make small slices about every two inches. Bake for 20-30 minutes, or until a skewer pulls out clean. Transfer to a wire rack and cool 15 minutes. Mix powdered sugar with just enough milk to make an icing the consistency of heavy cream. Drizzle over the kuchen and let dry for 15 minutes before slicing.

Things That Can be Carried on a Bike (#410)

A large cardboard box containing packaging materiel and another smaller cardboard box containing a new cast iron double Dutch oven with a lid that doubles as a skillet…I am very excited to cook in this pot…I’ll post recipes 🙂

Urban Simplicity.

Five Quotes from Desmond Tutu

Photo found here.

“Do your little bit of good where you are; it’s those little bits of good put together that overwhelm the world.” 

“Don’t raise your voice, improve your argument.”  

“In the end what matters is not how good we are but how good God is. Not how much we love Him but how much He loves us. And God loves us whoever we are, whatever we’ve done or failed to do, whatever we believe or can’t.” 

“When the missionaries came to Africa they had the Bible and we had the land. They said “Let us pray.” We closed our eyes. When we opened them we had the Bible and they had the land.”  

“Religion is like a knife: you can either use it to cut bread, or stick in someone’s back.”

Yes, I said five quotes, but here’s a few more…

 “We must be ready to learn from one another, not claiming that we alone possess all truth and that somehow we have a corner on God.” 

“Be nice to whites, they need you to rediscover their humanity.” 

“If you are neutral in situations of injustice, you have chosen the side of the oppressor.”

 To read more in the Five Quotes series, click here.

Urban Simplicity.

Donkey Bike…

While mindlessly flipping through web pages the other day I came across this bike. Odd looking, I thought. But practical. There’s something about it that I like. It’s called a Donkey Bike but for some reason it makes me think of my pugs…so ugly it’s attractive and lovable. Maybe that’s why I like it. Anyhow, to learn more about it, visit their site here.

Urban Simplicity.

45 Seconds and 51 Years Ago…

Okay…so this gives me goosebumps. It is a 45 second clip recorded slightly more than 51 years ago. And it is just as relevant today–even more so–than it was when it was recorded. Why, I wonder, are the messengers of peace on this planet so often assassinated…JFK, MLK, Ghandi, and of course Jesus the Christ, just to name a few. But I’m typing aloud because I know the answer to my own question…fear. Sorry for being so melodramatic but this short clip really moved me.

Urban Simplicity.

Two (contrasting) Views from My Handlebars…

What a difference a few hours can make. The above photo is looking skyward to beautiful clear skies, and the below is earthbound in torrential rain. The top photo I took this morning on my way to work. I was about to enter another busy day and stopped for a moment and straddled my bike to take a few deep breathes while looking skyward. And this evening, on my way home from the gym, I got caught in a heavy downpour. It was one of those rains where rather than trying to duck out of it (I was on a bike after all) it is easier to simply surrender to it. And at one point I stopped to snap a couple photos of the reflections of color in the wet street.

Urban Simplicity.

Things That Can be Carried on a Bike (#407-409)

#407 (top photo)…an external hard drive.
#408 (middle photo)…a whole raw chicken.
#409 (bottom photo)…groceries, dog food, and a gym bag full of clothes.

Urban Simplicity.